The Milky Way, our home galaxy, offers one of the most breathtaking show nature has to offer. For landscape and nature photographers, capturing it is both a technical challenge and a deeply human experience. I got into astrophotography in 2022, and in this article I’m sharing my best techniques, my beginner mistakes, and my settings and tips for finding the ideal places and moments to observe and photograph the Milky Way. Whether you’re shooting with a high-end DSLR or a budget mirrorless camera, this guide is for you.
Where and when to see the Milky Way?
Before you pull out your tripod, there are a few essential conditions to meet. Here are the parameters I check and plan for before every night going outside.
No light pollution
This is the number one criteria. It’s impossible to photograph the Milky Way from a city or even a village, because the orange glow of light pollution literally erases the stars and the details of the Milky Way. Look for rural areas far from urban centres, national parks, or nature reserves. To identify the darkest zones near you, use the light pollution map or the DarkSky Finder app.
👉 It’s hard to get a 100% pure sky with zero light pollution on the horizon. Most of the time, there’s still a faint orange band on the horizon that can be slightly reduced in post-processing.
horizon created by low clouds, which slightly reflects light pollution.
The right season for the Milky Way
Milky Way visibility depends on your hemisphere and time of year :
- Northern hemisphere : the Milky Way is visible from April to September, with peak visibility of the galactic centre in June-July. If you’re in Europe or North America, this is the perfect window.
- Southern hemisphere : the optimal period runs from February to October, also peaking in June-July.
👉 Note that the orientation of the Milky Way varies depending on where in the world you are and the time of year. For example, in France in early April/May, the Milky Way is nearly horizontal, while in late July it is more vertical.
Clear sky : no Moon, no clouds
A full moon is the enemy of nightsky photographers, it lights up the sky as much as a giant streetlamp. Plan your sessions around the new moon or in the days just before and after. You can check a lunar calendar for moon phases, but more importantly look at moonrise and moonset times : if the moon doesn’t rise until 5AM, your whole night is fine 😉
👉 The moon can also work in your favour, for example to light up your foreground in the early evening, especially if it sets shortly after. It’s rare, but it happens.
Clouds, on the other hand, are a different story 😅 There’s no point going out if the sky is completely overcast, you won’t see a thing. A clear sky is absolutely essential for astrophotography !
Optimal timing
The Milky Way is generally most visible a few hours after sunset and before moonrise. Plan your sessions around both of these. In midsummer, true darkness sometimes doesn’t arrive until after 11pm, so yes you’ll have to sacrifice some sleep, but it’s worth it.
A clear southern horizon
The galactic centre of the Milky Way lies in the direction of south to south-east from the northern hemisphere. A clear horizon in that direction is essential. A compass (on your phone), the Star Walk app, or Photopills are enough to check your orientation and to understand where the Milky Way will rise.
Essential apps
Two apps always come with me every night sessions :
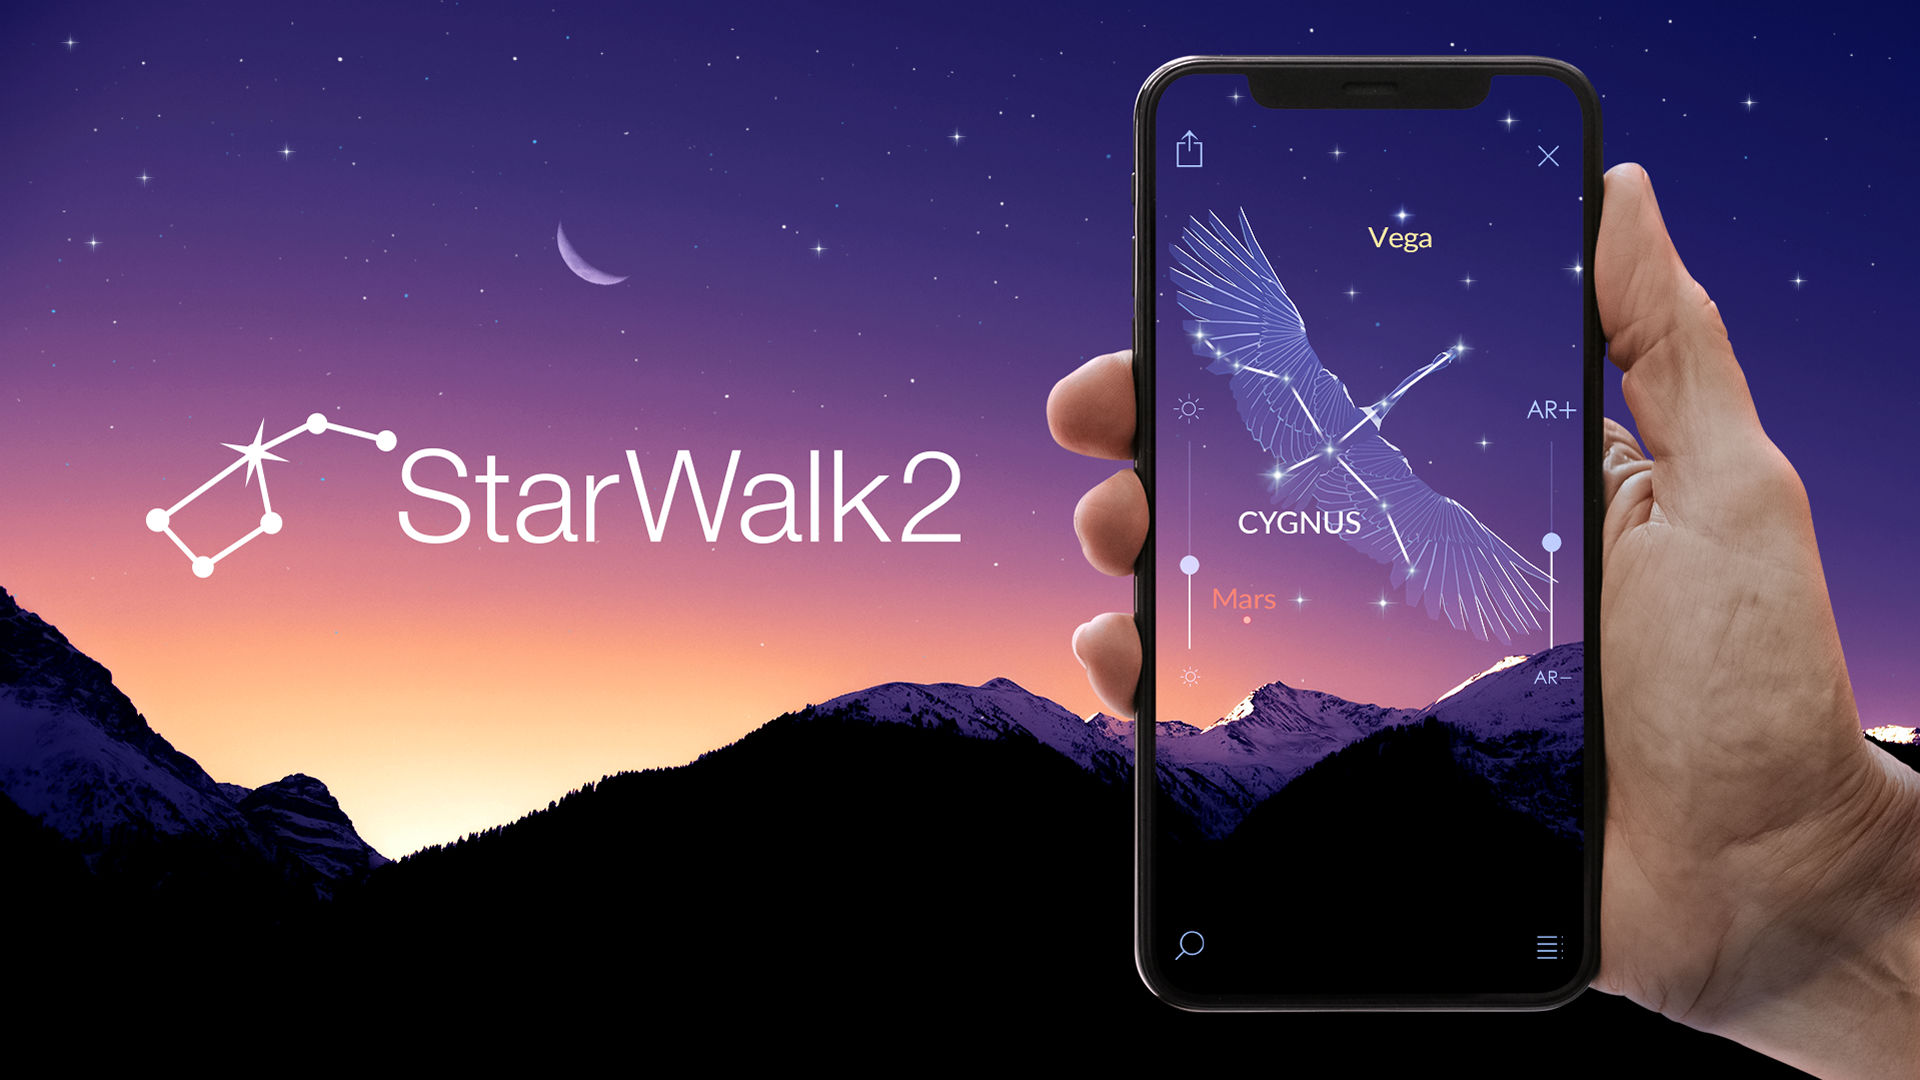
- Star Walk (the free version is enough): it shows the real-time position of the Milky Way in the sky, constellations, and lets you fast-forward time to anticipate what time and direction it will appear.
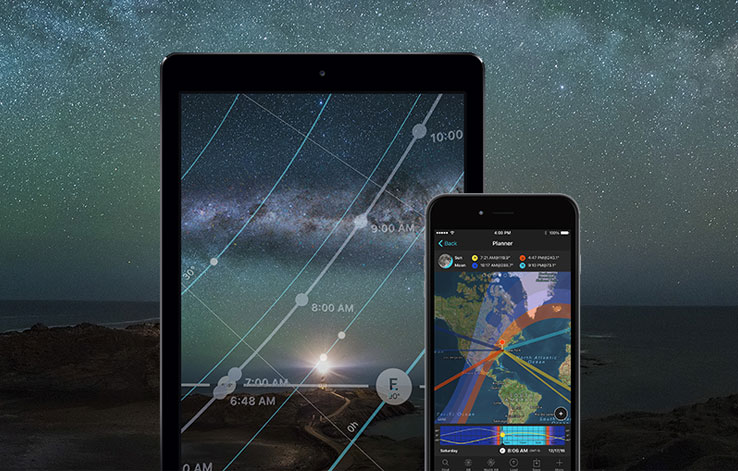
- PhotoPills : more comprehensive and technical, it lets you calculate your ideal shutter speed and visualise the Milky Way’s position in augmented reality on location. It’s incredibly useful, I can’t do without it ! You can see exactly when the galactic centre will be visible, its orientation, etc. Perfect for planning compositions from my couch 😅
What gear do you need to photograph the Milky Way?
Essential equipment
📸 A DSLR or mirrorless camera capable of shooting at high ISO without generating too much noise. No need for the most expensive camera body, a recent entry-level APS-C camera gives excellent results. Current references for landscape astrophotography include the Sony A7IV, Nikon Z6III or Canon R6 Mark II for full-frame, and Sony A6700 for APS-C budgets. That said, the photos in this article were taken with far more accessible gear (Nikon D750 for the majority, and Nikon Z8 for some).
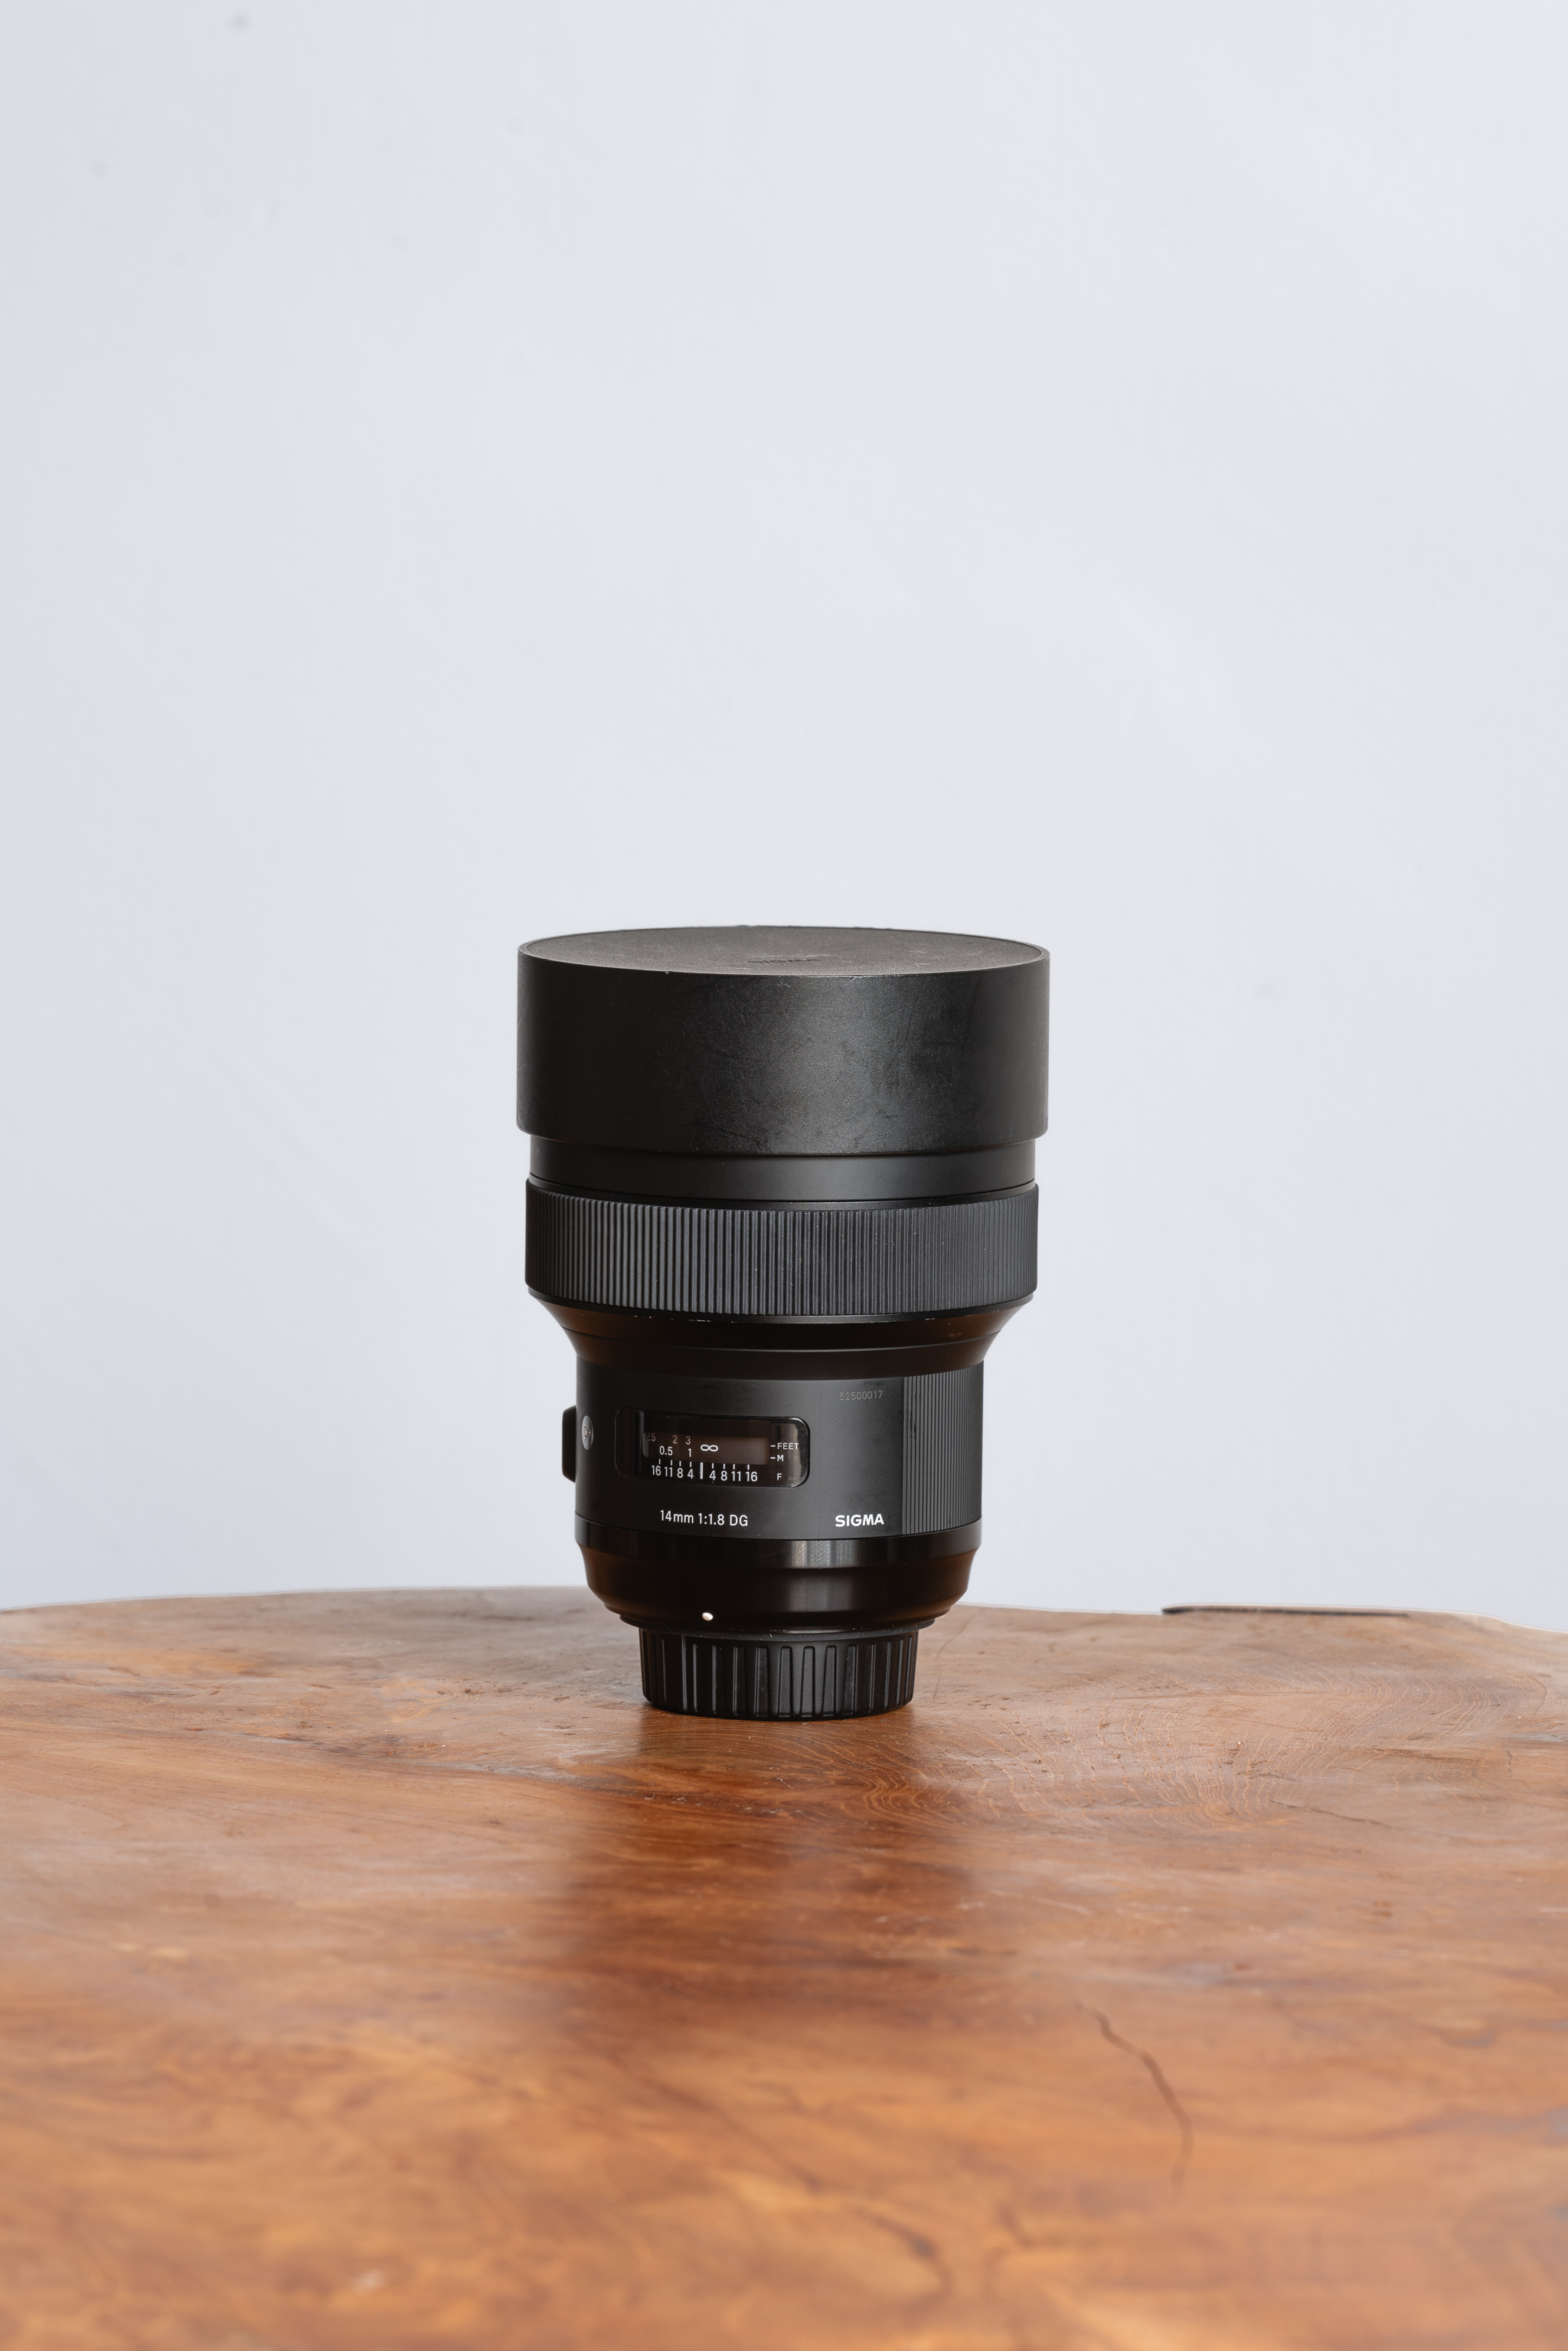
🔍 A wide-angle lens with a large aperture, ideally f/2.8 or wider. This is the most important piece of gear! I use the Sigma 14mm f/1.8 (available in several mounts) for all the photos in this article: the wide angle lets you capture a foreground, a subject, and the Milky Way all at once, and the large aperture lets in a huge amount of light, which limits the need to push ISO and therefore reduces digital noise. I previously had a 24-120mm f/4 — honestly, it’s pretty limiting for truly “wow” astrophotography images, since f/4 lets in too little light.
🔭 A sturdy tripod : there’s no compromise here. You need a solid, heavy tripod (or one you can weight down on windy nights), because the slightest vibration will wreck your long exposures. And it’s always reassuring to know your gear is secure rather than worrying it’ll end up on the ground !
🎛️ A remote shutter release or cable release, to avoid camera shake when triggering. Alternatively, your camera’s self-timer (2 seconds) works perfectly well, as well as timelapse mode.
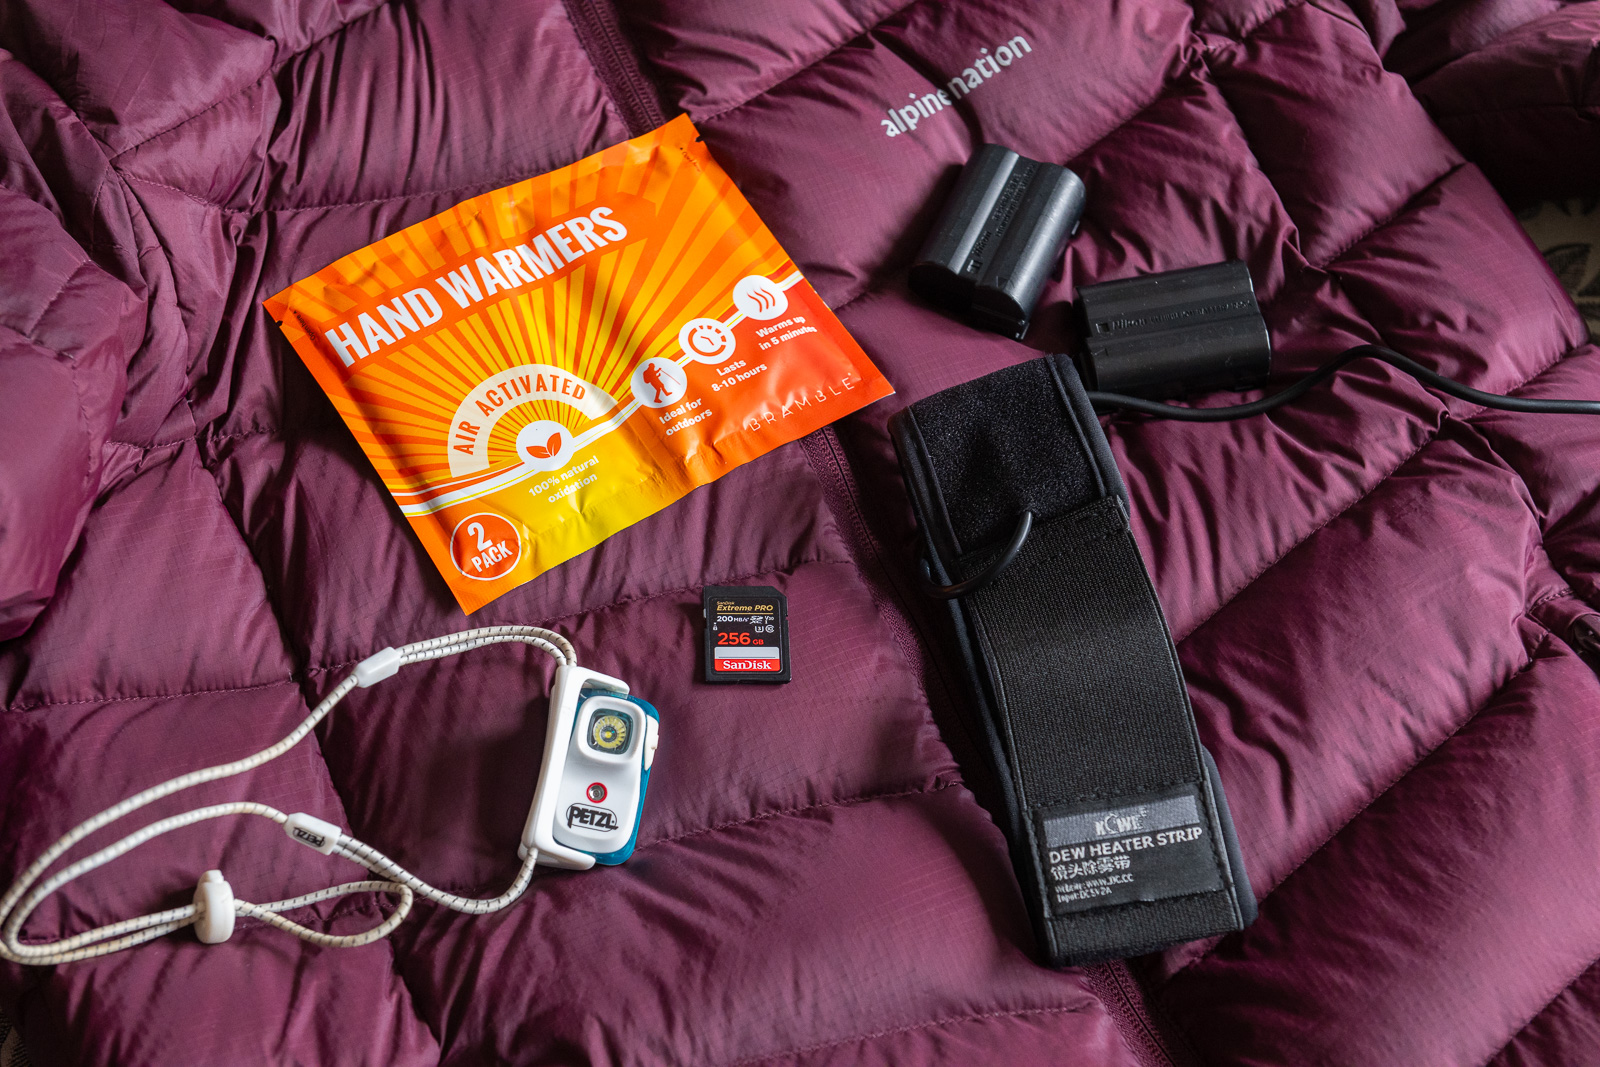
💡 Don’t forget in your bag : at least one spare battery (the cold night air drains them fast), a backup memory card, a warm jacket even in summer, and a red light headlamp to preserve your night vision. A small flashlight for creative lighting or quickly illuminating a foreground can be cool too. I always pack hand warmers because I run cold and standing still makes it worse. You’ll find the complete gear list that helped me capture the photos in this article, gathered over the years across different countries, with links directly to the products I use (these are affiliate links, I earn a small commission, but it doesn’t change anything for you).
♨️ If you live in a humid region (like I do), consider adding a lens dew heater. It wraps around your lens and gradually eliminates any moisture that could build up and ruin your photos. I’ve been using the KiwiFortos one recently and I’m very happy with it.
🧐 Do you need an equatorial mount, a modified camera, or a tracker to get started ? Short answer is no. Long answer would be maybe eventually, these are generally aimed at deep-sky photography (nebulae, distant galaxies) and require a serious learning curve. For nightscape photography, a good camera body, a fast lens, and a solid tripod are more than enough to start. Keep it simple, master your basic settings, and consider additional equipment only when you want to go further. Personally, I have none of these things and I feel I do just fine 😌
📱 What about a smartphone ? Some recent phones can indeed take night shots, if the lens is clean, you have a mini tripod and very little light pollution. But the results will look very different from the photos in this article, keep that in mind. If you already have a camera body and a phone, why choose the phone for Milky Way photography ? I’ve tried several times shooting in RAW at night with my Samsung S23, it wasn’t exactly the greatest success of my life 🥲
Camera settings for Milky Way photography
Three Key Parameters
💡 ISO : start between 1600 and 3200 ISO, then adjust based on ambient brightness. Don’t be afraid to push it, modern sensors handle high sensitivity very well, and noise can be corrected in post-processing with tools like Denoise in Lightroom or Topaz DeNoise. I regularly shoot up to ISO 6400 and the Z8 handles it very well.
👁️ Aperture : open as wide as possible (the smallest f/ value). A wide-angle prime lens with a large aperture is ideal : the Sigma 14mm f/1.8 is my favorite for astrophotography, but the Samyang 24mm f/1.4 is also very good.
🏃♀️ Shutter speed : this is the trickiest parameter. Too short and your image will be underexposed, too long and the stars will trail due to Earth’s rotation (not what we’re going for here). In practice, between 10 and 25 seconds depending on your focal length works well, but above all : TEST IT !! And read the 500 rule below ⤵️
The 500 rule and its limits
You’ll hear a lot about this when starting out in astrophotography. the “500 rule” is the most well-known method for calculating the maximum exposure time without star trails : divide 500 by your focal length to get your maximum exposure time. So at 14mm, that gives 500/14 = 35 seconds.
But take this rule with a pinch of salt : at 35 seconds with my 14mm, I get a very visible trailing. So I went down the rabbit hole because it was driving me crazy :
- On an APS-C sensor, you need to divide by the focal length multiplied by your camera’s crop factor (1.5 for Nikon/Sony, 1.6 for Canon). Example : 14mm on a Canon APS-C → 500 / (14 × 1.6) = 22 seconds.
- The 500 rule is outdated. It was designed for low-resolution sensors. On modern high-resolution bodies (36MP and above), use the 400 or 300 rule instead. The NPF rule, more precise, takes into account aperture, photosite size, field declination, etc (I won’t risk explaining it but you can read more about and calculate it through the link). Just know that PhotoPills calculates it automatically in-app, which is pretty reliable.
👉 In practice, I recommend doing your own tests on location and zooming into the stars at 100% on your screen to check sharpness before shooting multiple frames. With my Nikon Z8 and the Sigma 14mm f/1.8, I usually use 13 seconds. At 15 seconds I see slight star trails, and below that I’m underexposed.
Additional settings
📝 Shoot in RAW : that’s non-negotiable in astrophotography. JPEG compresses and destroys information that can’t be recovered in post-processing. In RAW, you can correct exposure, reveal the galactic core, adjust colours, and properly reduce noise. I’ll write a post soon on how I edit my Milky Way photos if you’re interested !
🎨 White balance : set it manually between 3200K and 4000K for a natural result. Leaving it on auto is also fine, it can be adjusted in post anyway, but if you’re shooting a timelapse, the white balance may shift through the night and that’s more annoying to fix.
∞ Manual focus to infinity : enable manual focus and turn your ring to the ∞ symbol (on Nikon lenses), or focus on a bright star through the viewfinder/screen until it’s a clean, round dot. Always test it : the infinity mark on the lens isn’t always the true optical infinity. Make sure your shots are sharp, it would be a shame to sacrifice a night’s sleep and come home with nothing.
🎧 Disable in-camera noise reduction. Not many people know this, but this function takes a second “dark” image after your shot to subtract thermal noise, which doubles your waiting time between frames. Better to handle noise reduction in post-processing, where you have much more control.
🫨 Also disable image stabilisation. It’s designed to compensate for the micro-movements of your hand when shooting. On a tripod, there’s nothing to compensate (shouldn’t be at least) and it can actually introduce parasite vibrations by trying to correct a movement that doesn’t exist. This can result in slightly blurry stars on 15-25 second exposures for no real reason.
EXIF data is in the caption under each photo.

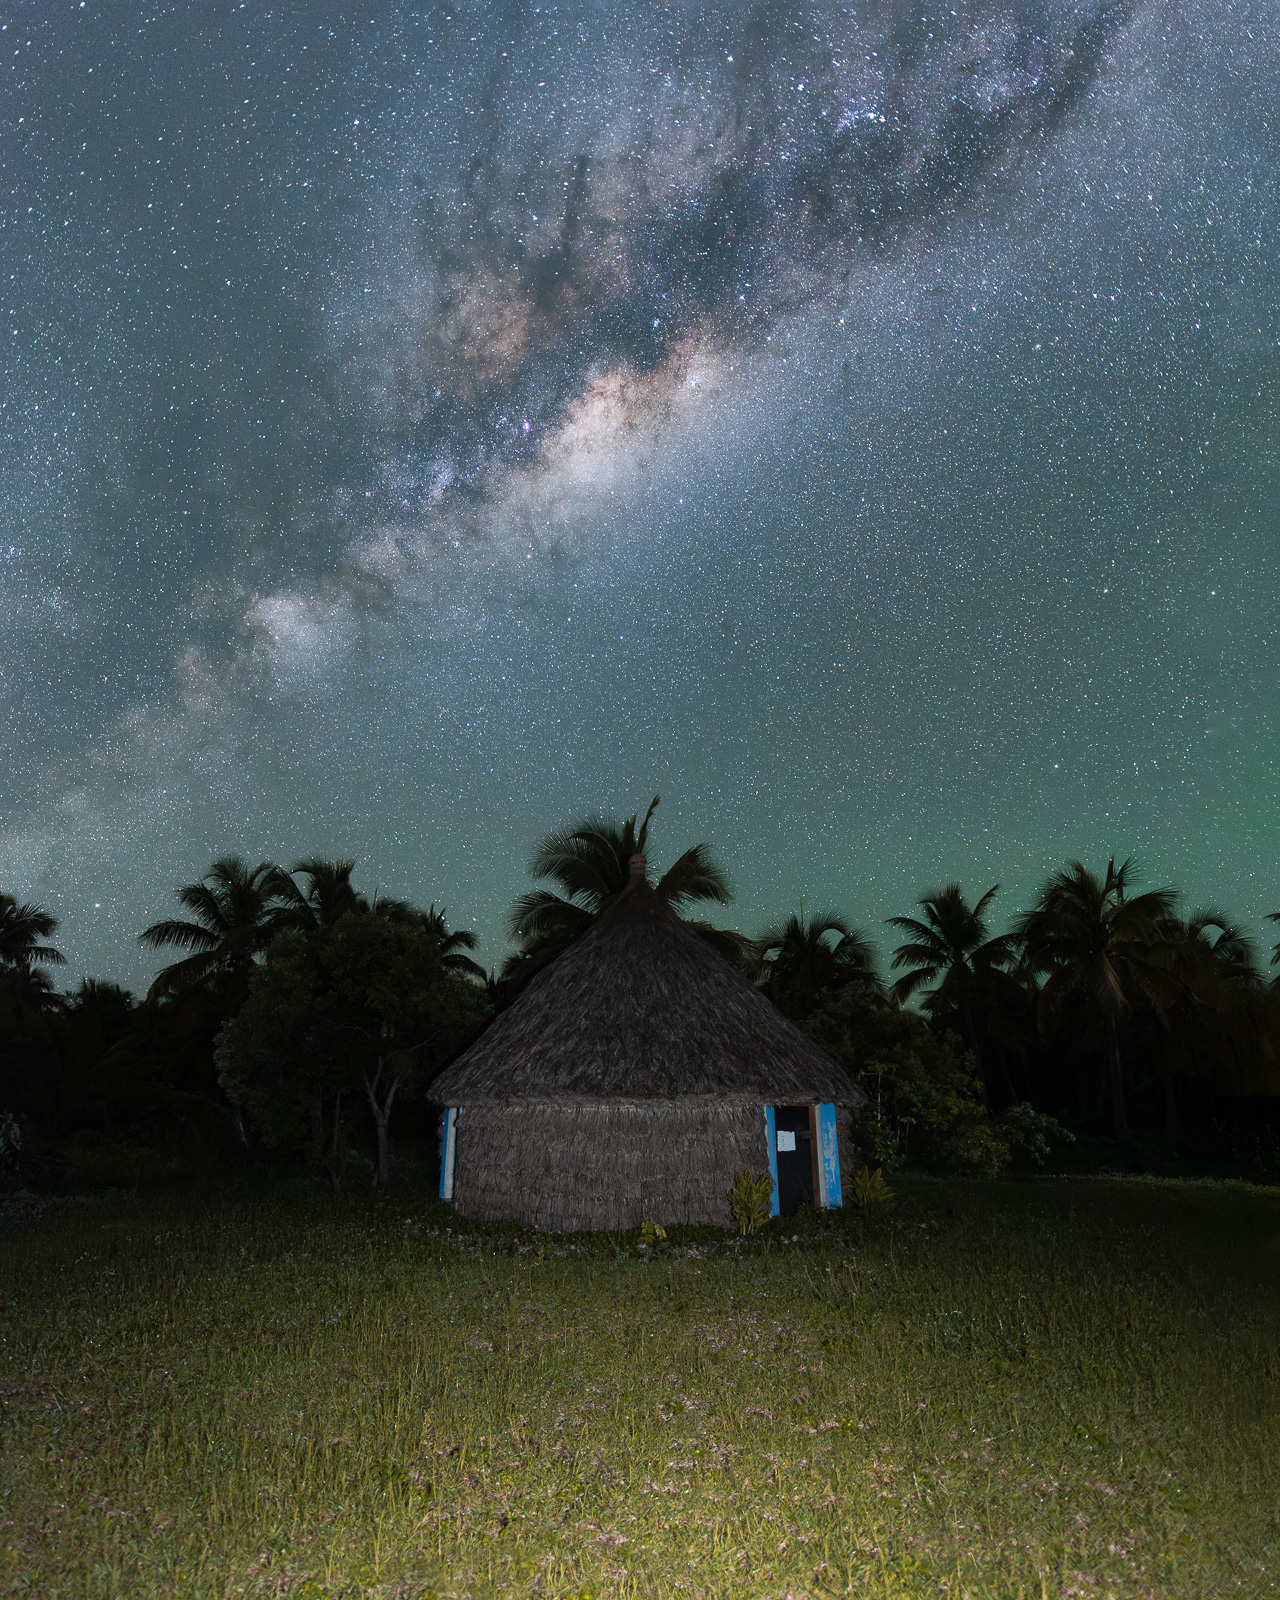
Photo 2 : Ouvea, New-Caledonia (13s à f/1,8, ISO5000)
Composition : the real secret to beautiful star photos
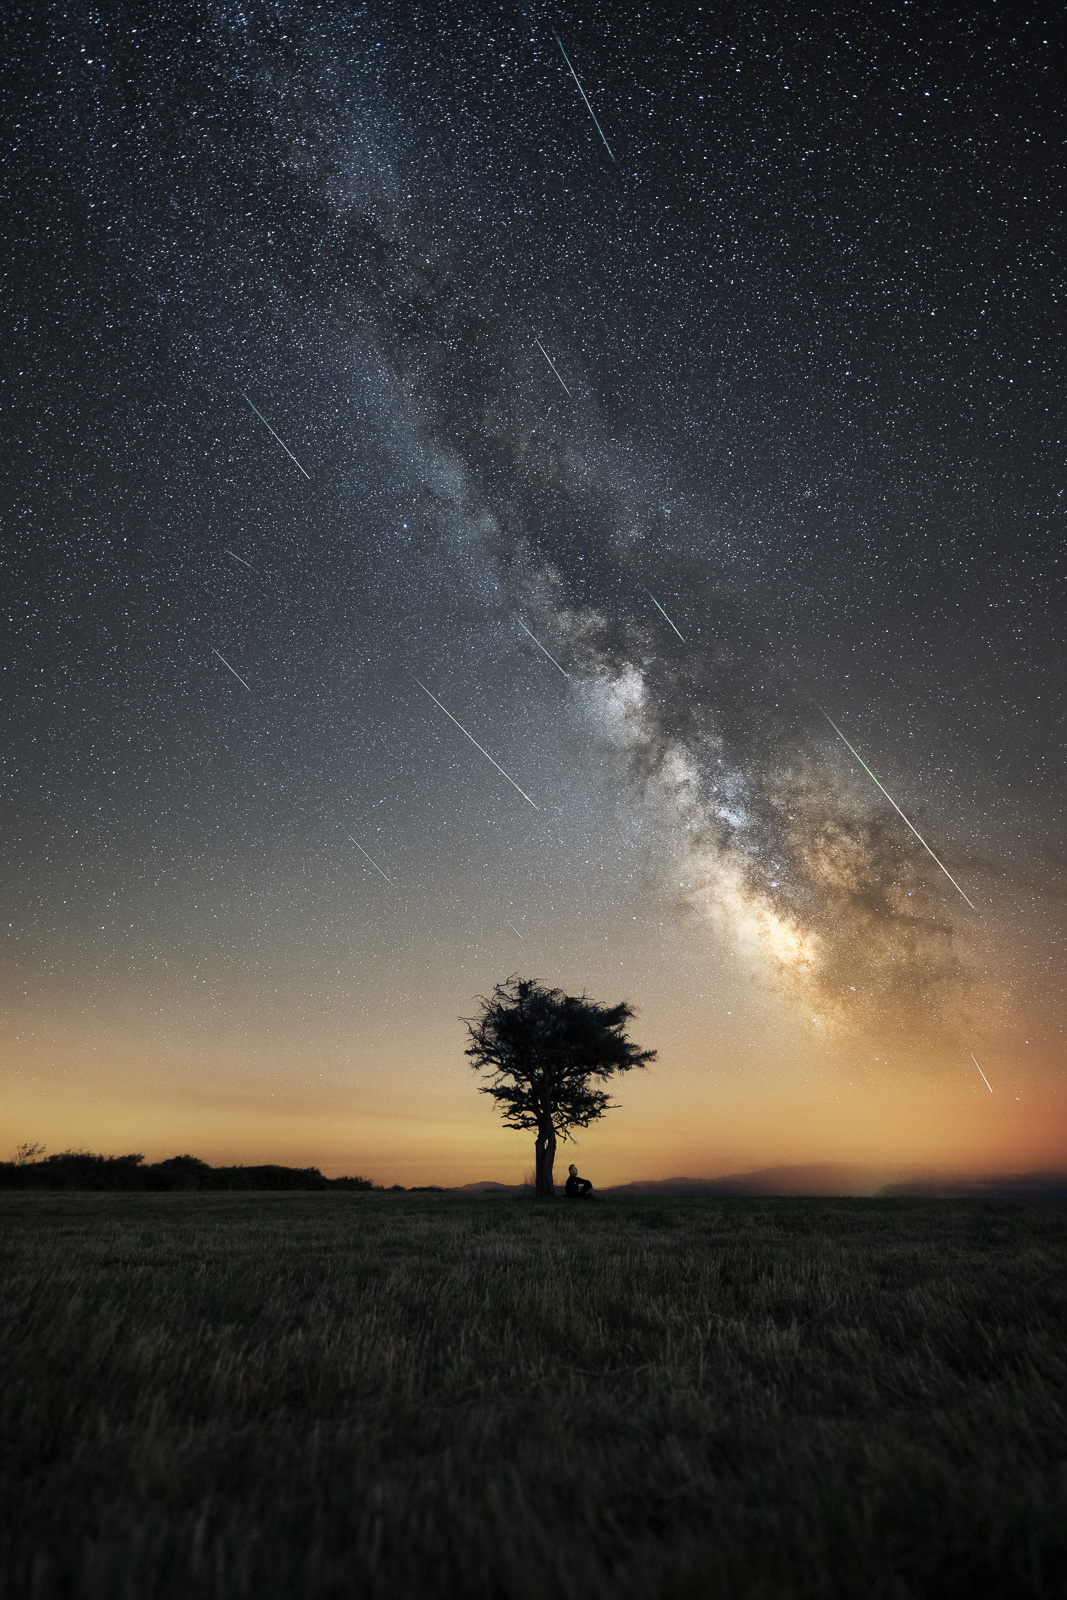
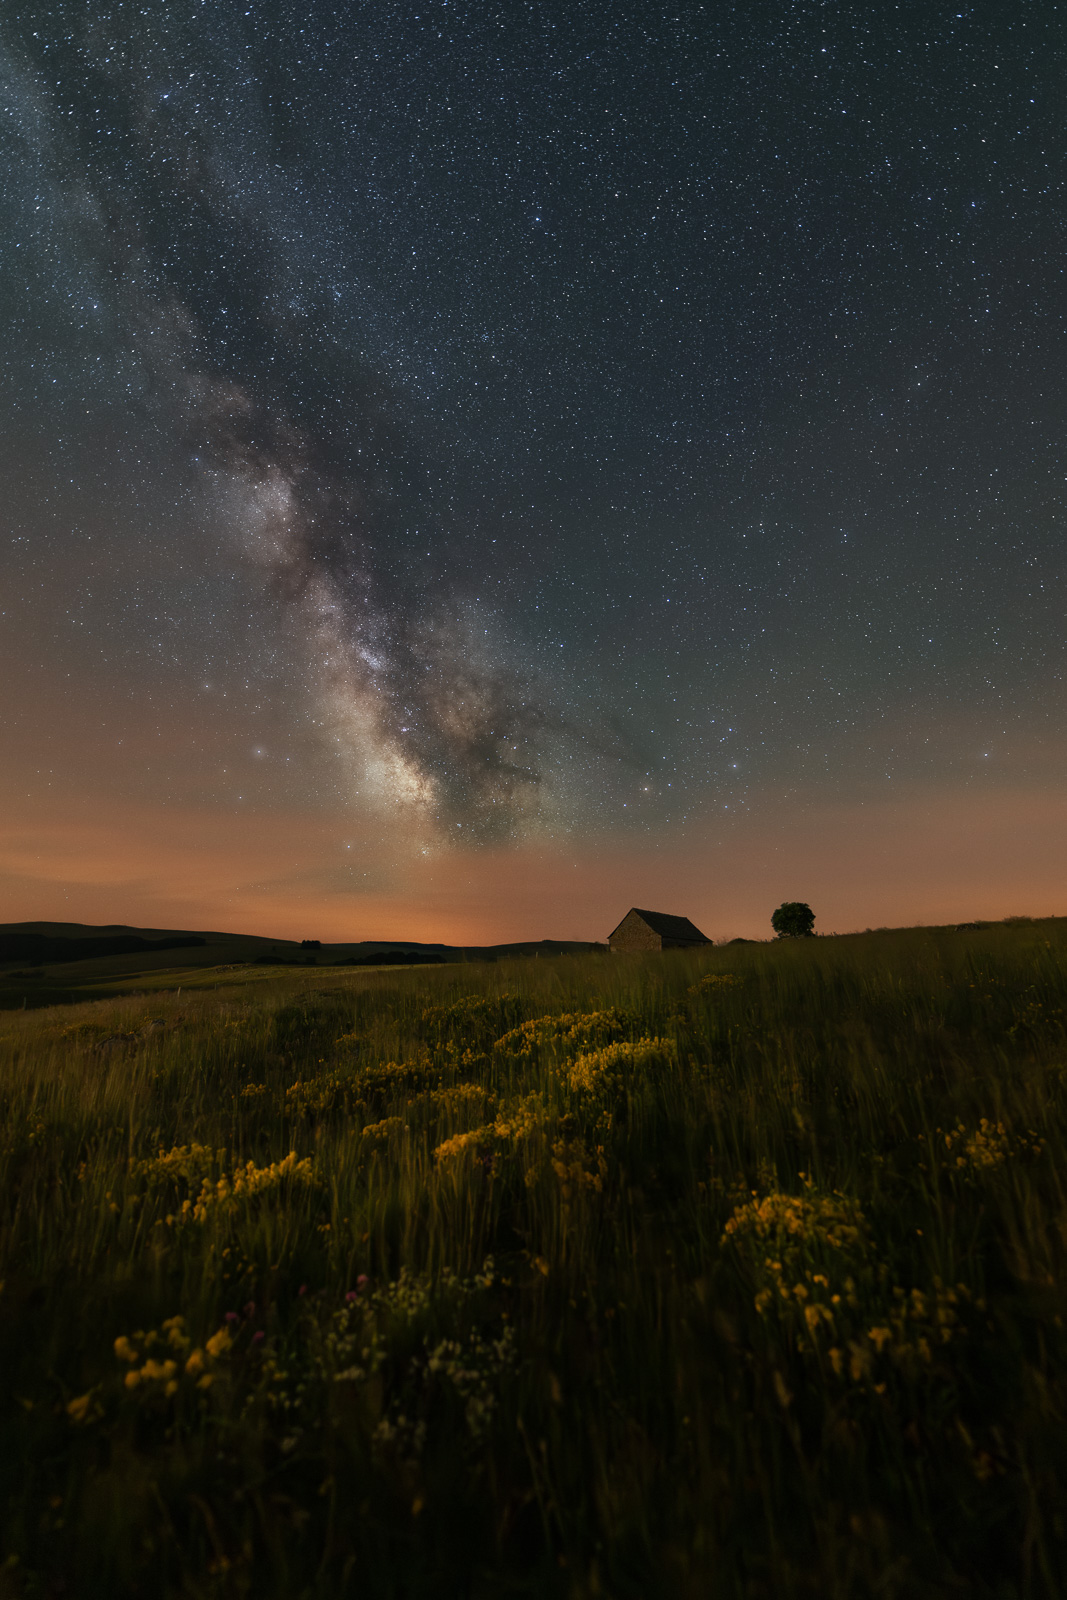
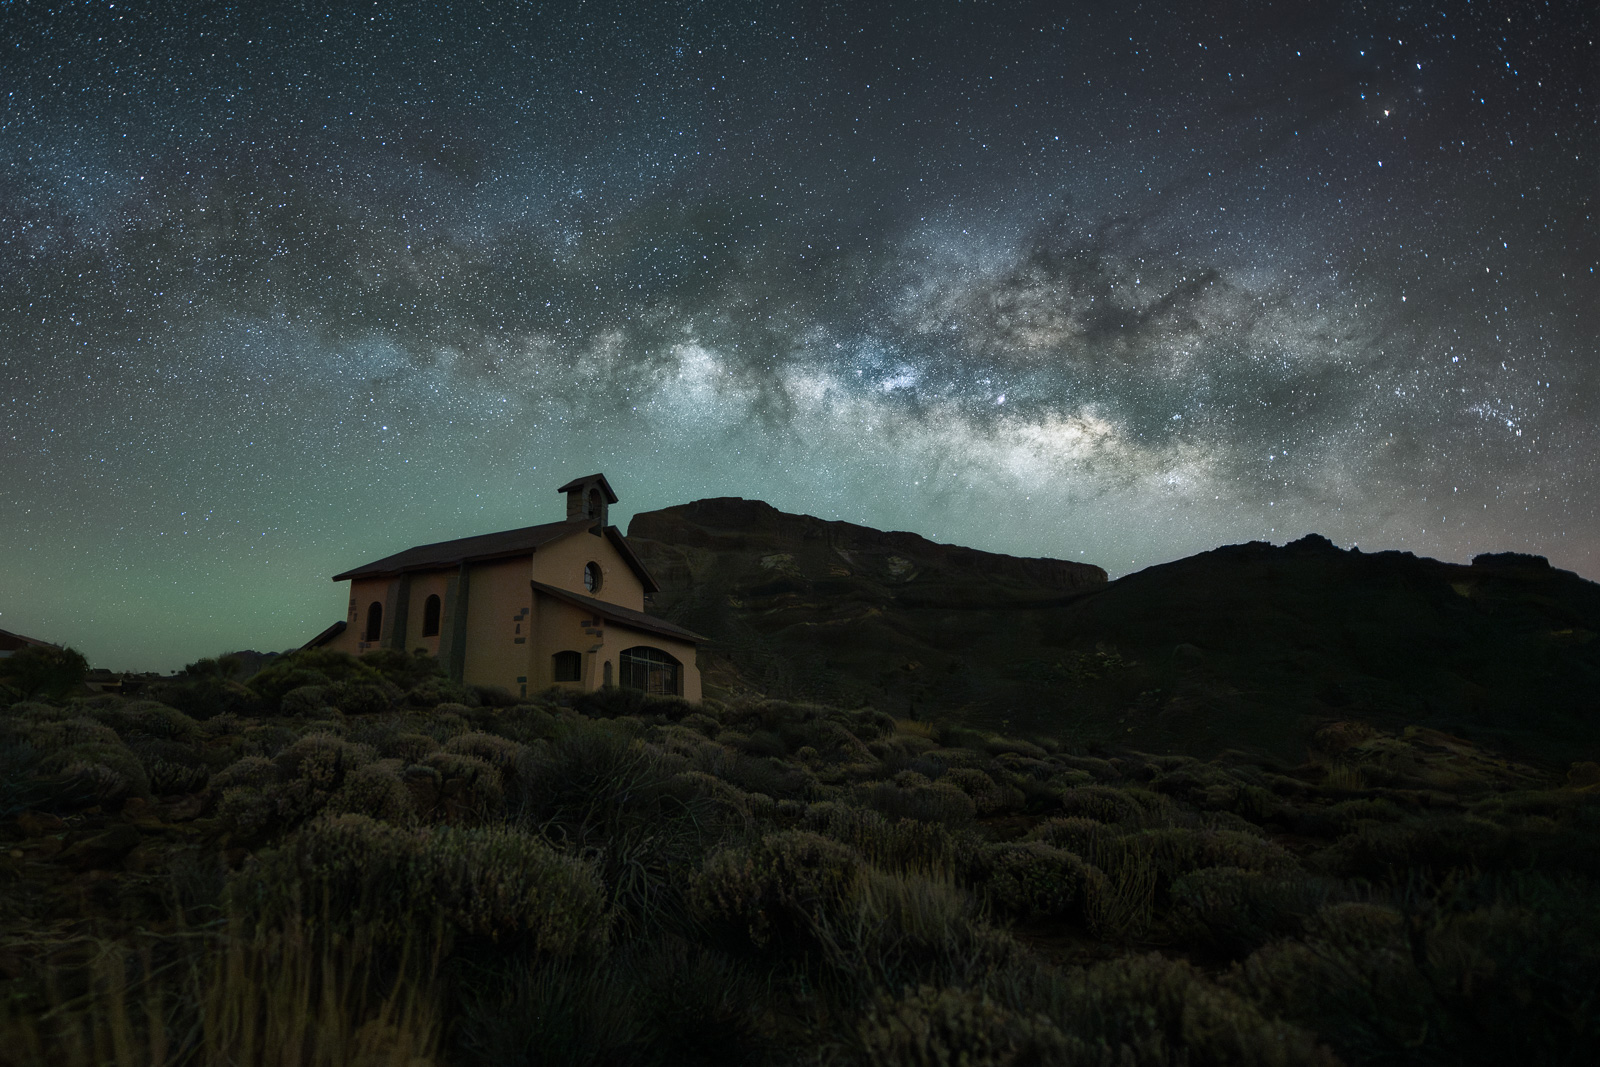
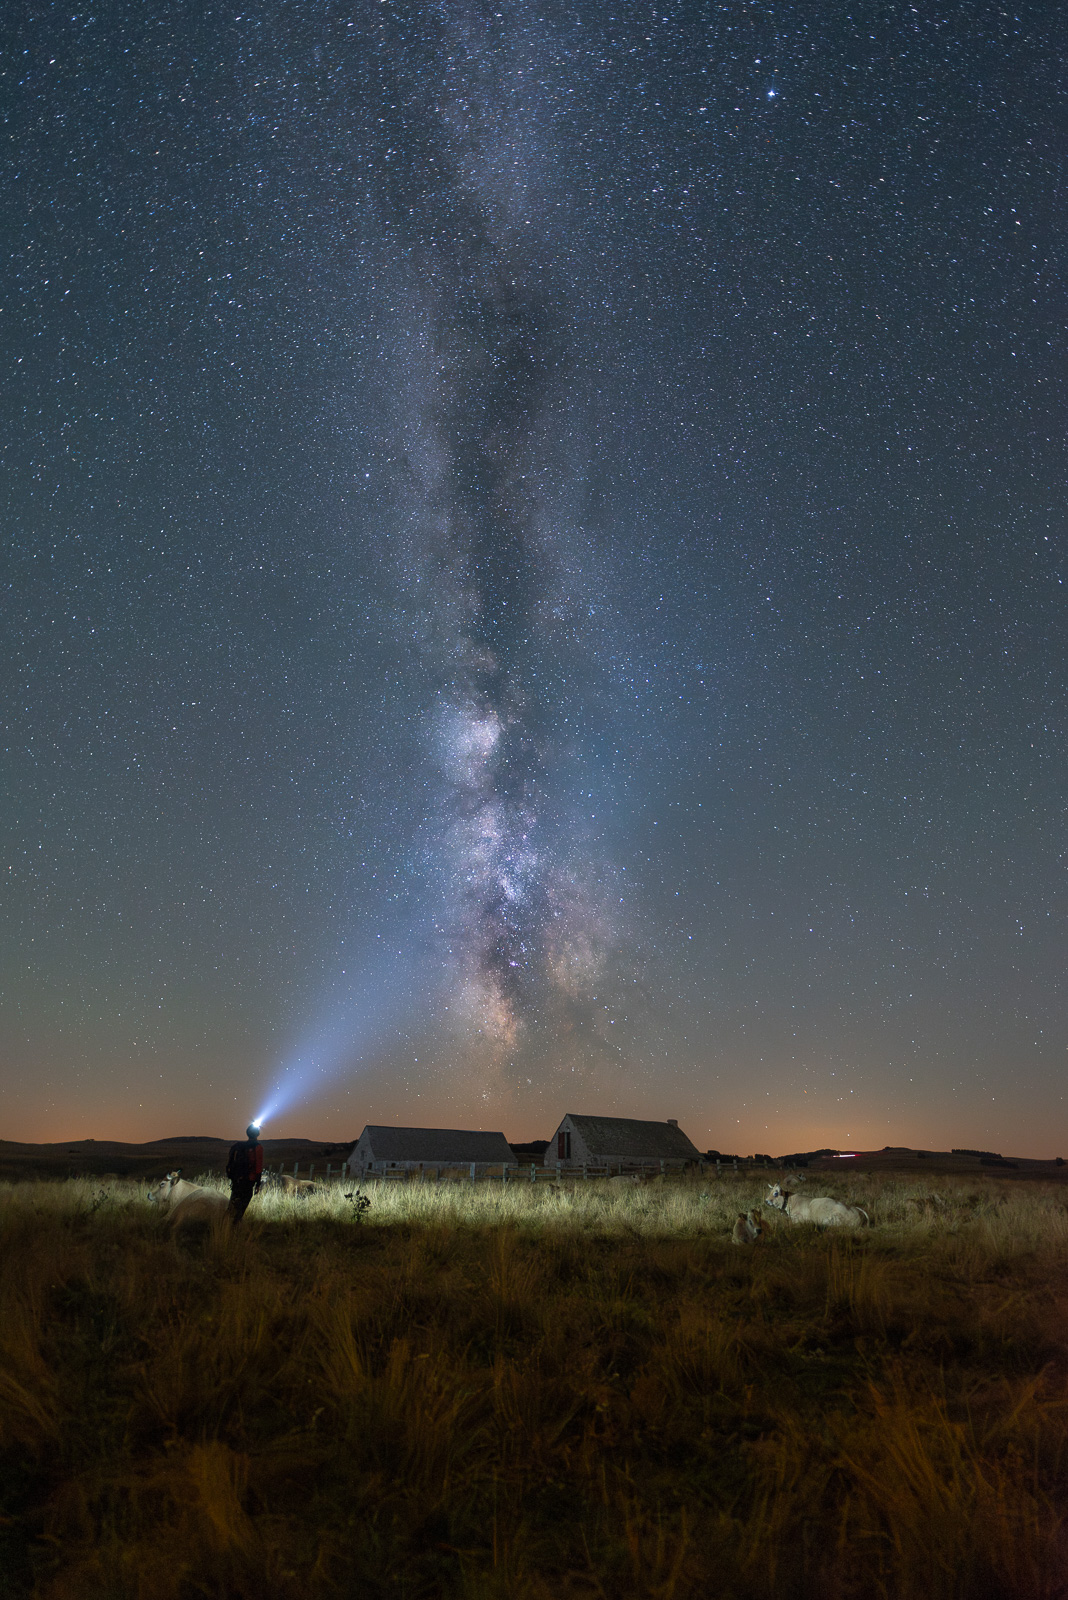
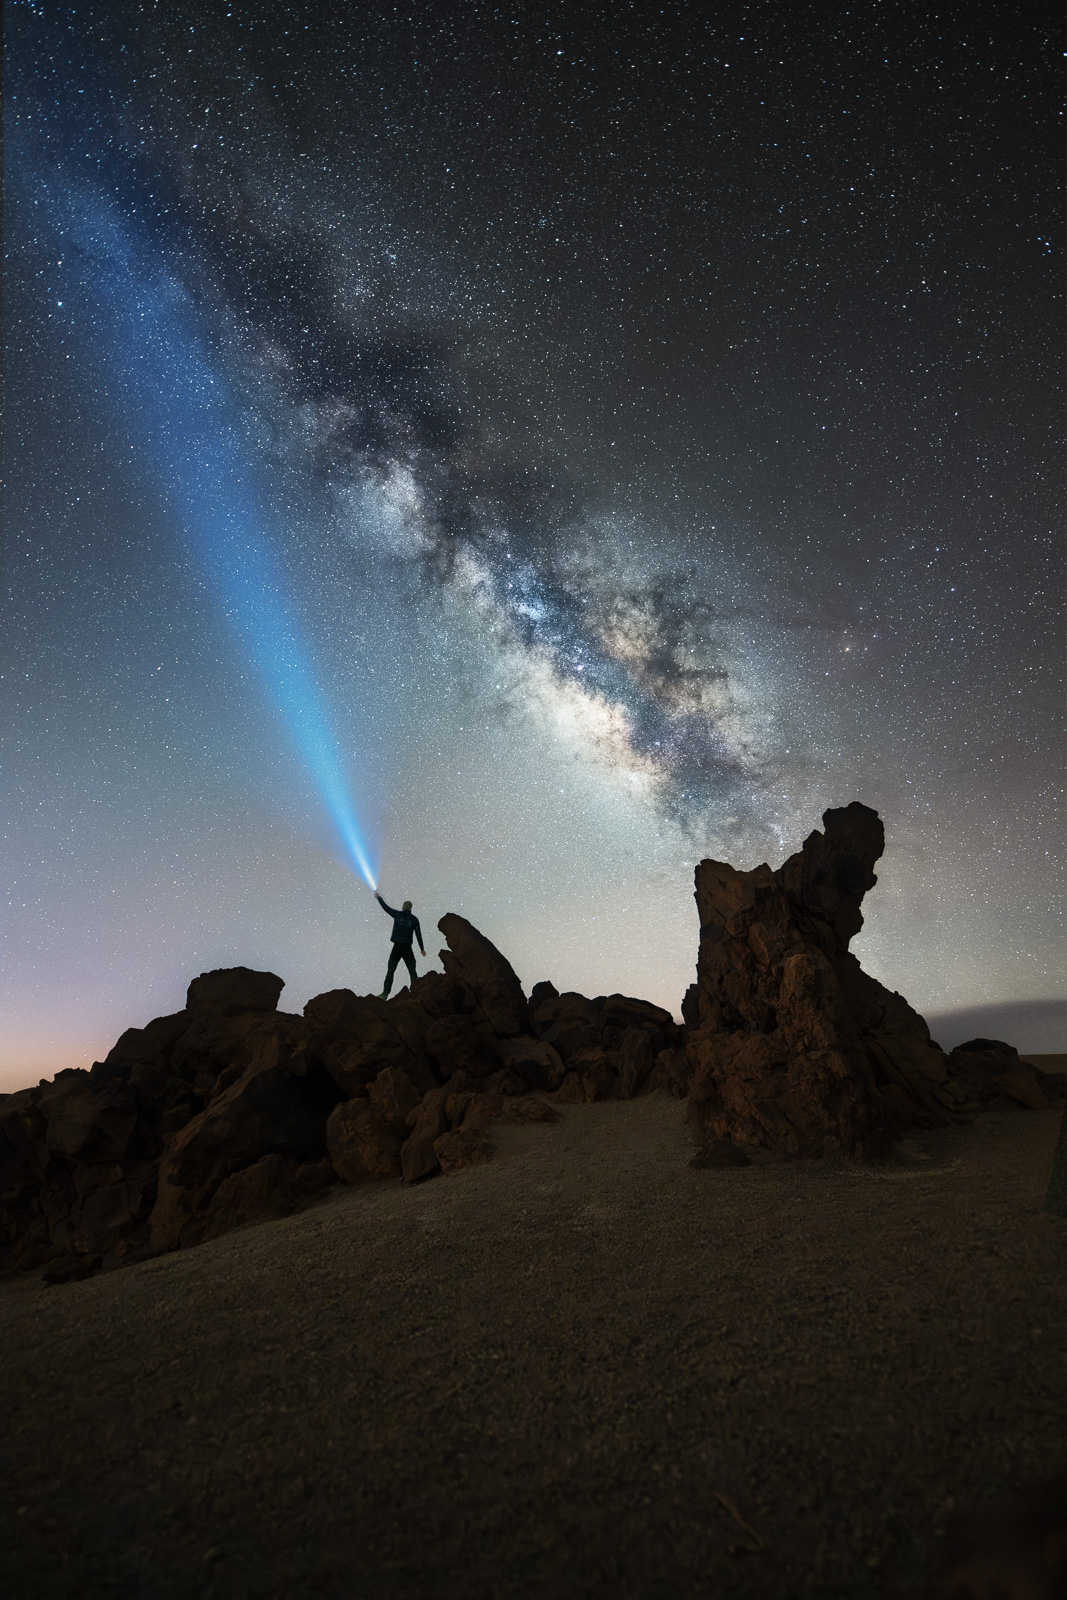
I’ve already mentioned this in my guide on how to photograph the northern lights, but technique alone doesn’t make a great photo. A Milky Way shot with no interesting foreground is just a pretty sky and nothing more. Including a foreground (a gnarled tree, a church, a frozen lake, a cabin, rocks, the options are endless imo) transforms a “wow” shot into a “holy moly” photo : it adds depth, context, and a visual story.
Try using the rule of thirds to place the Milky Way dynamically in the frame. Personally, when I’m short on inspiration, a well-centered composition works just fine, simply having the Milky Way alongside an earthly element already feels magical. If possible, scout your location during the day (or at least at dusk) to plan your compositions before total darkness sets in. Be aware : if the spot is well-known or easily accessible, you may not be alone. It’s a bit annoying but that’s part of it, nature belongs to everyone ☺️ Astrophotographers are generally respectful enough not to use their headlamp and light your compositions (not always, so don’t hesitate to ask them to stop).
👉 If you arrive early, the Milky Way might not be visible yet. You can still photograph the starry sky, but the foreground becomes even more essential for telling a story.
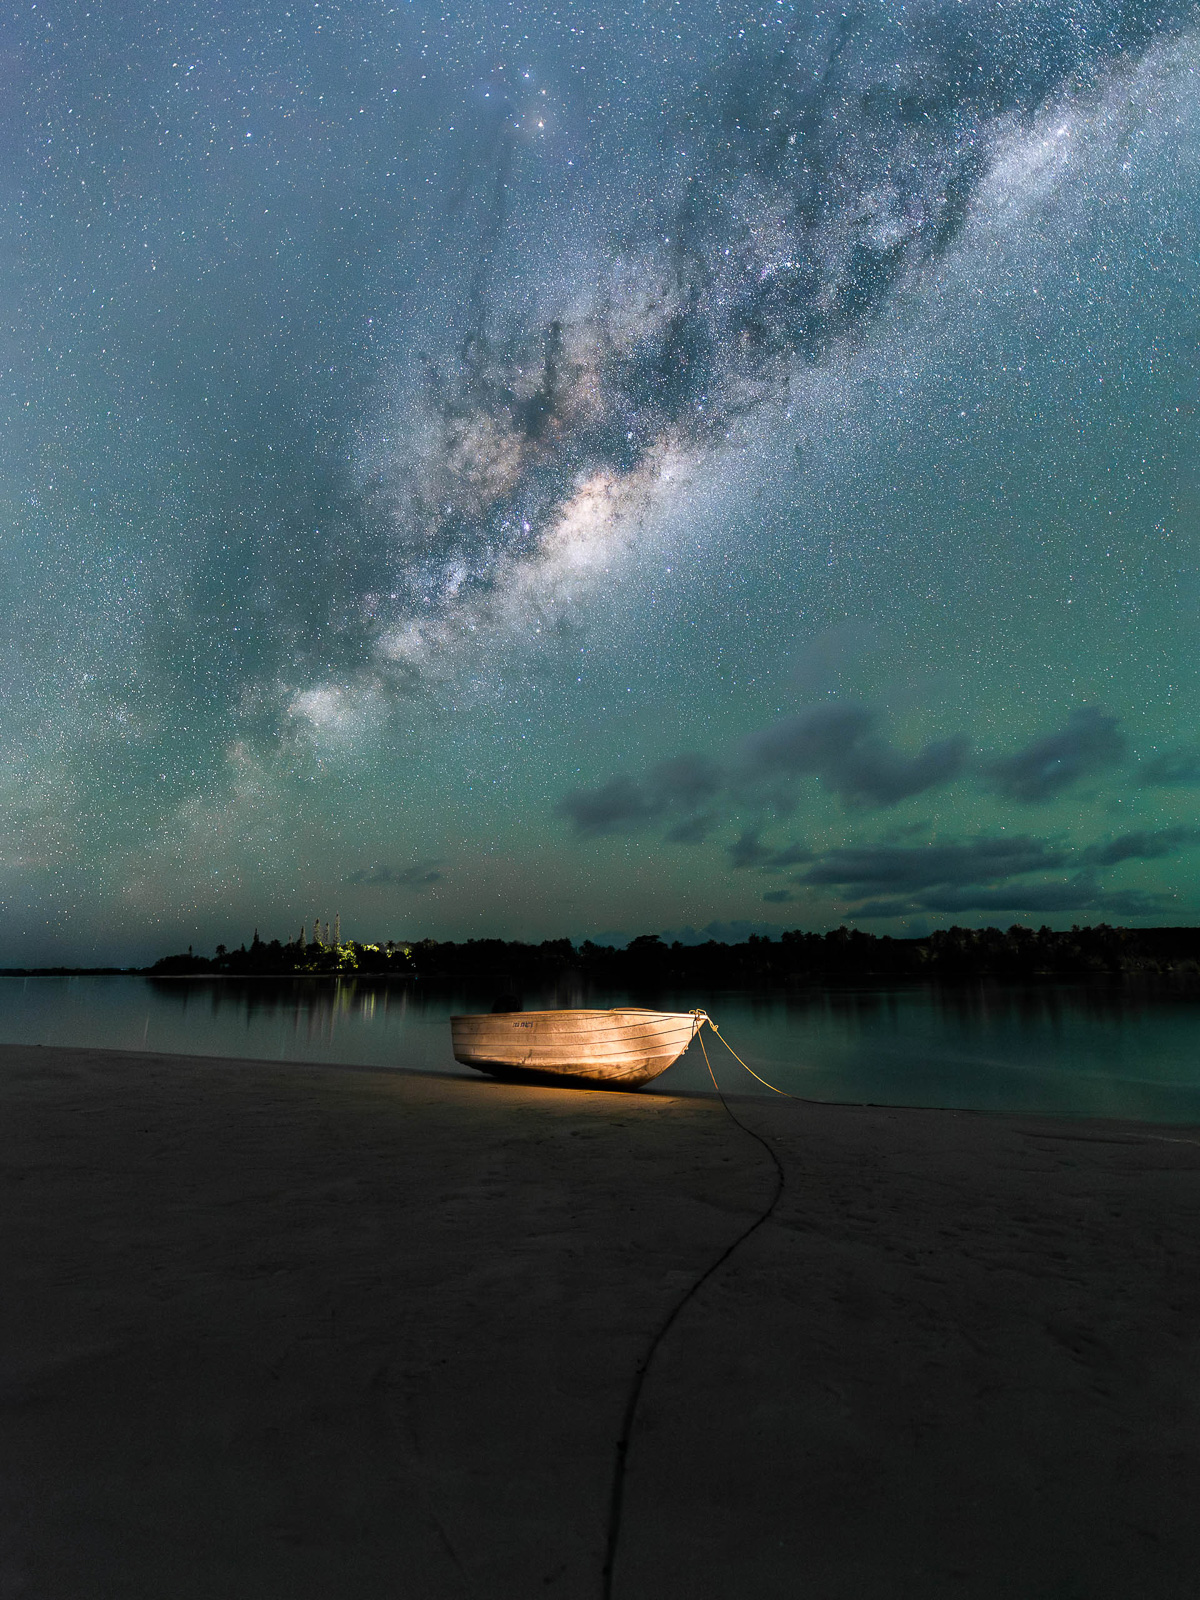
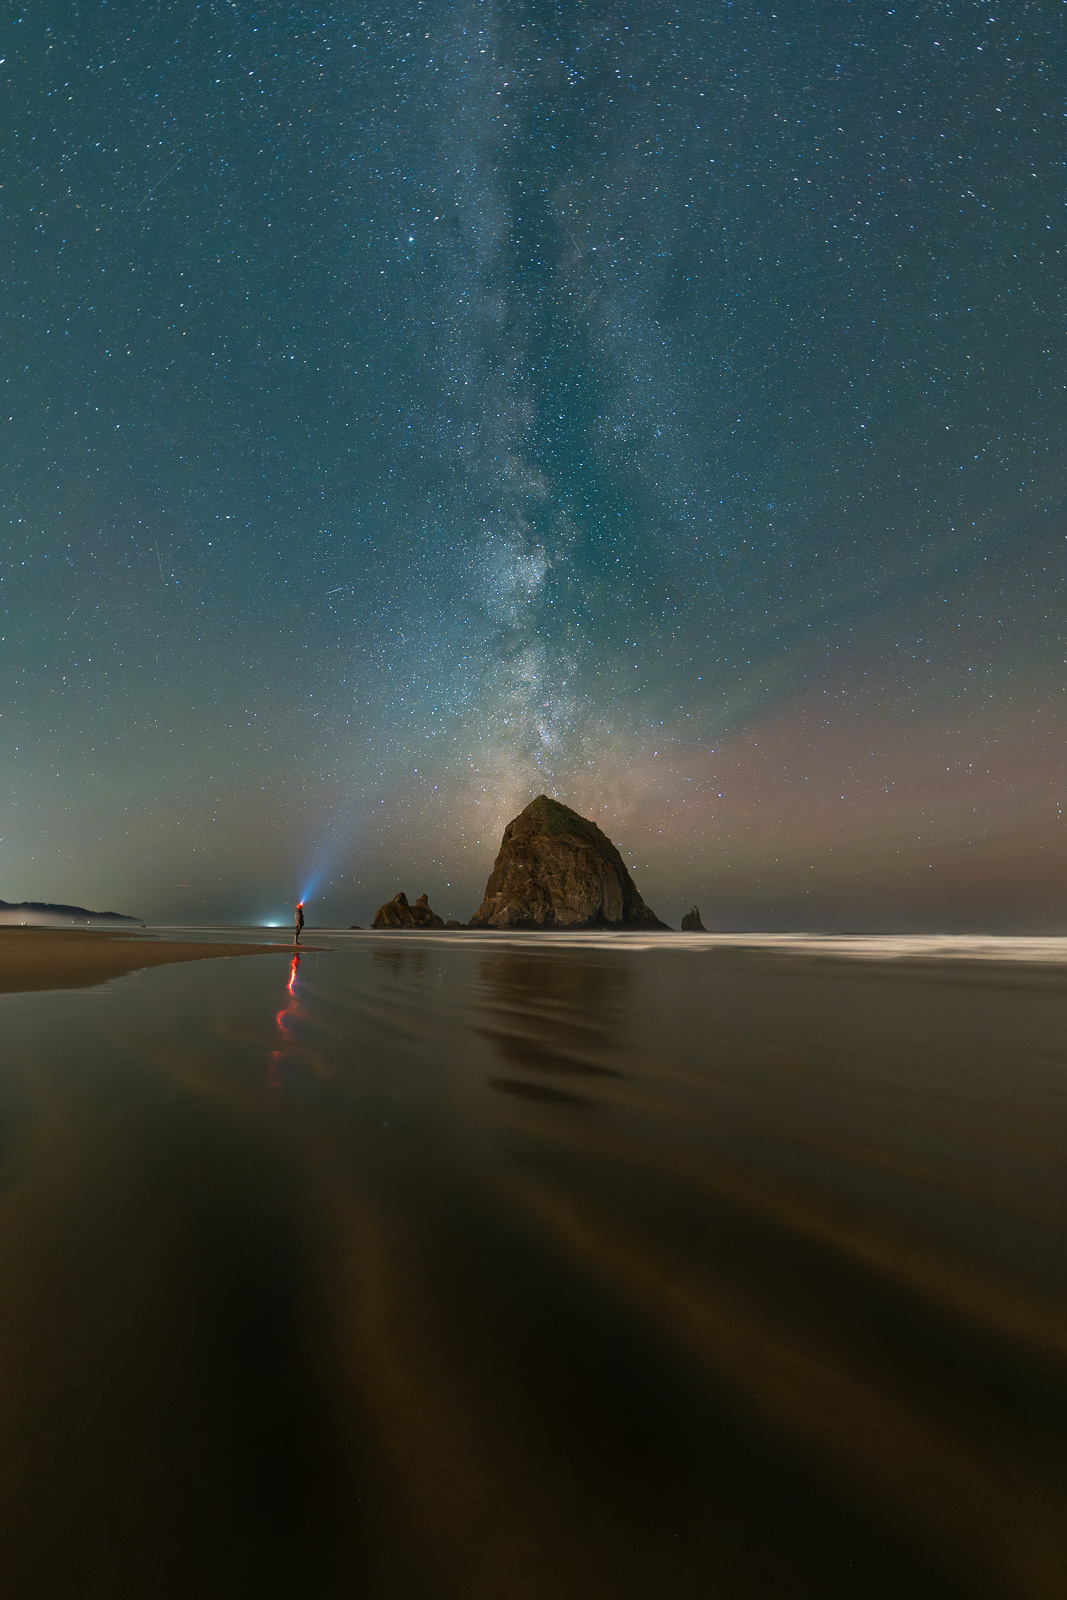
Photo 2 : Cannon Beach, Oregon (13s à f/1.8, ISO 2500)
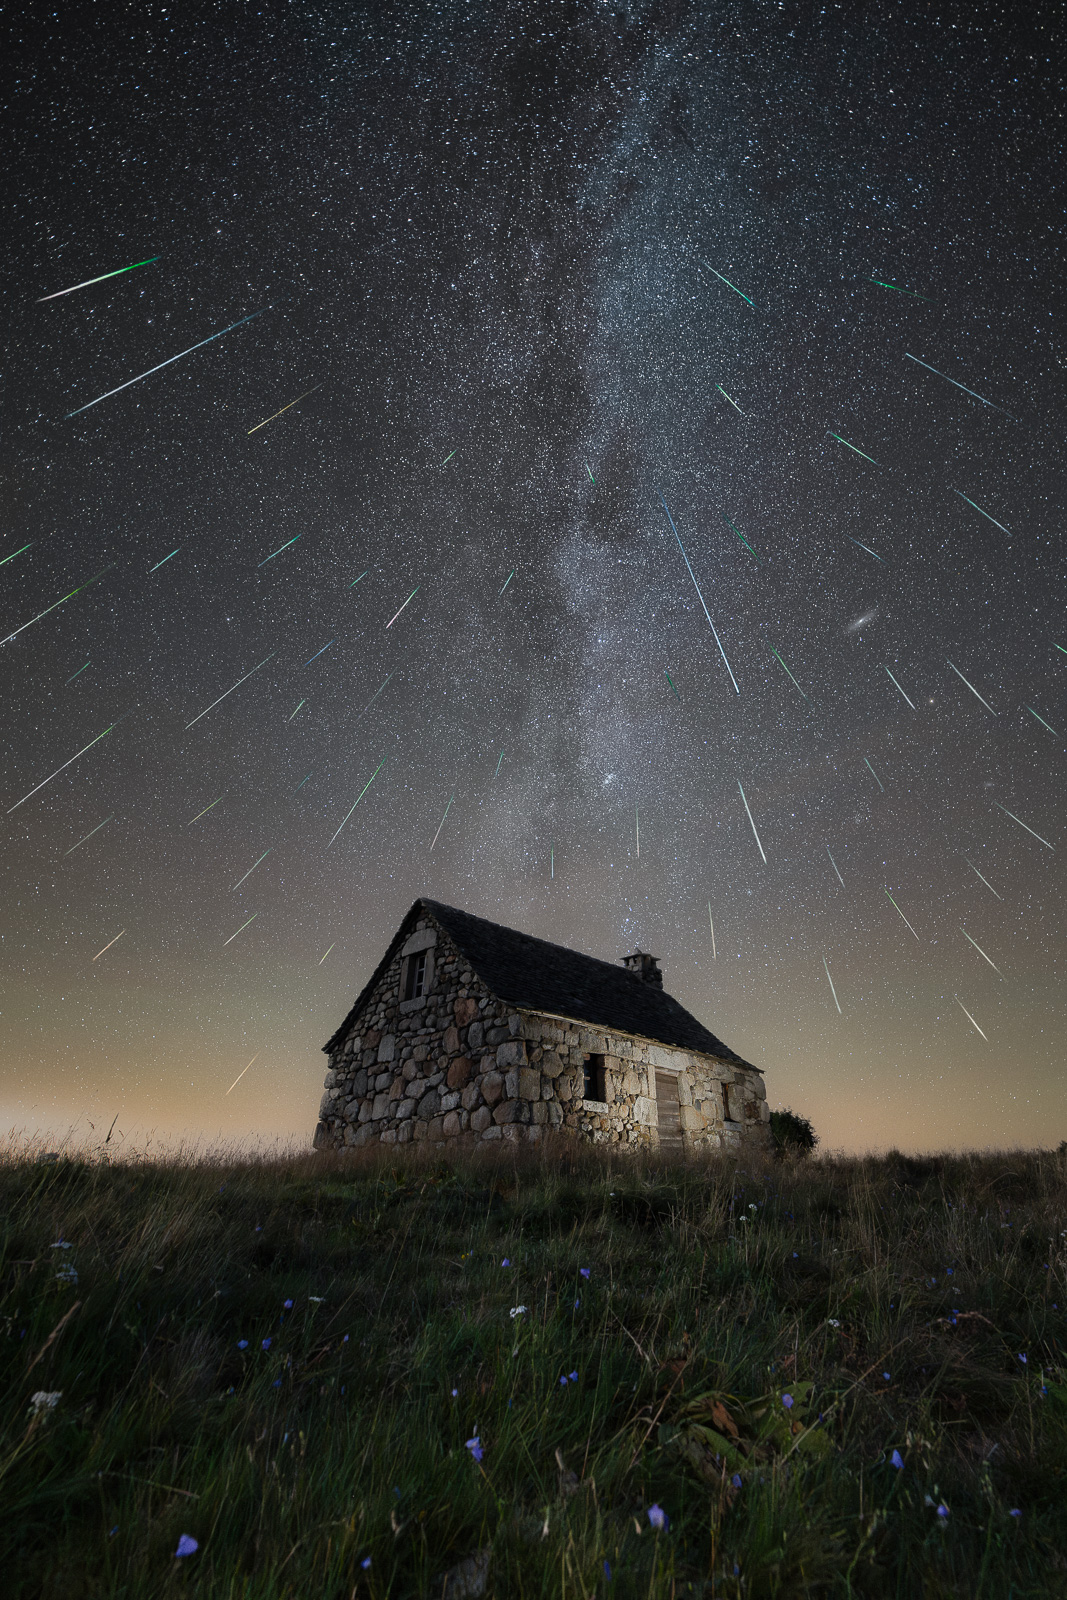
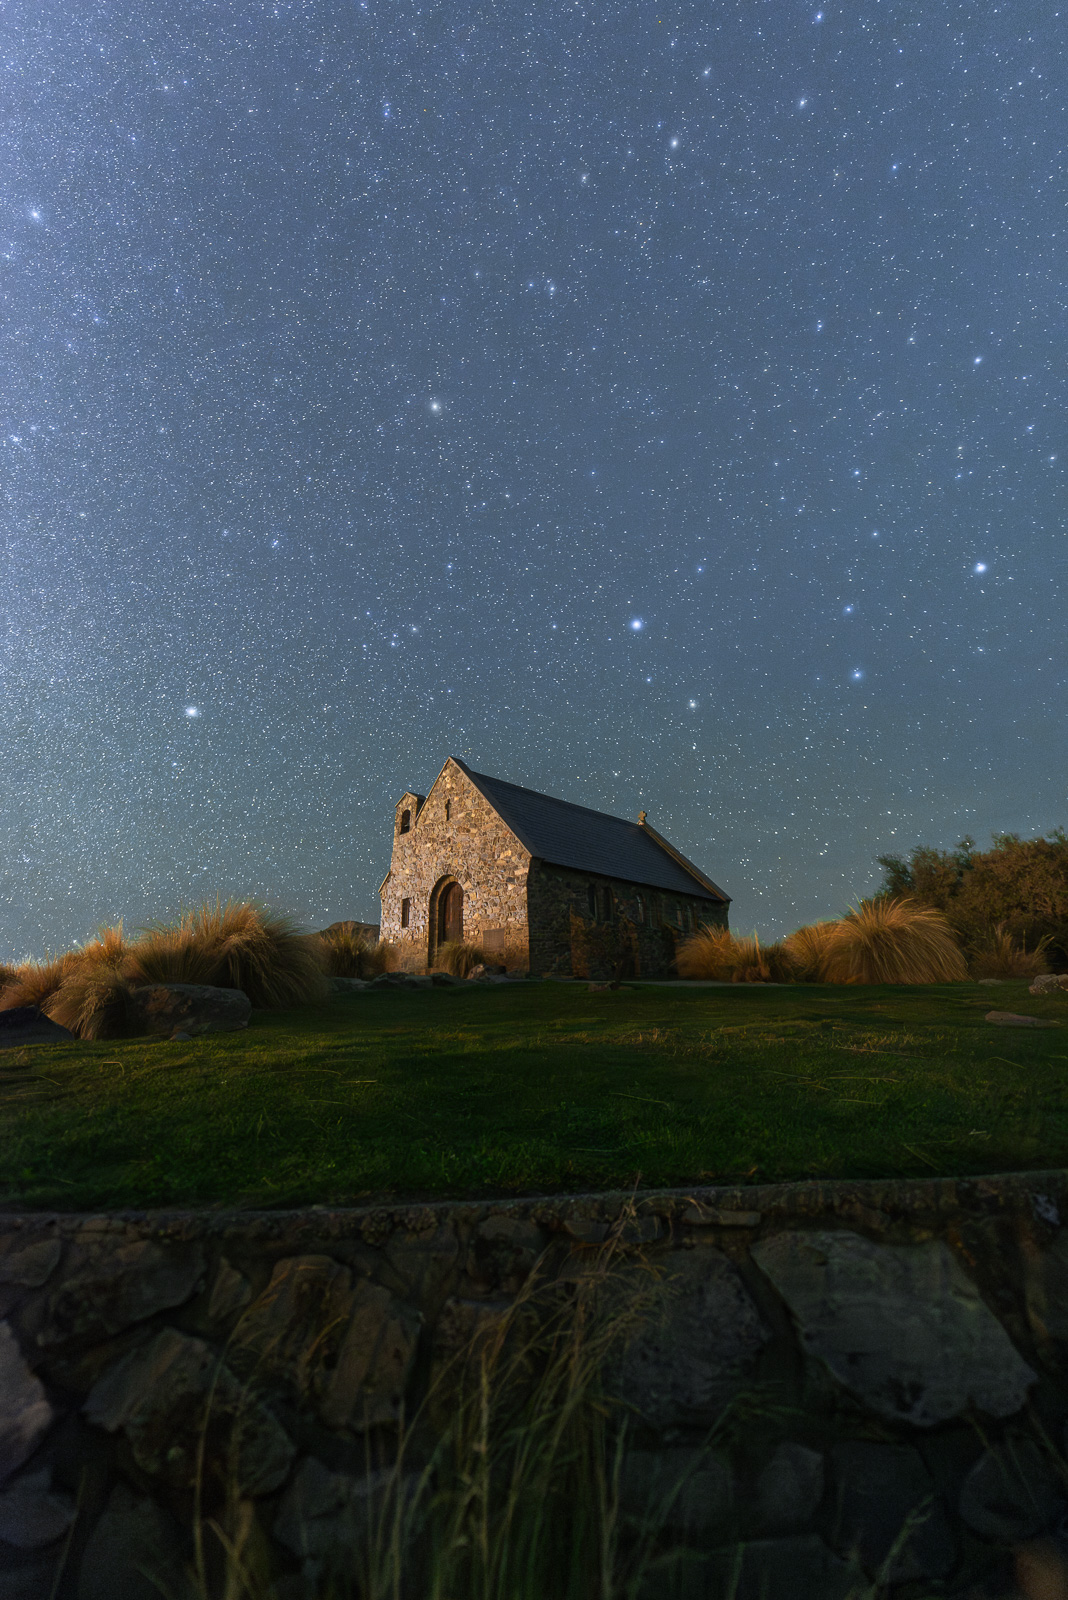
Photo 2 : Perseid meteor shower, Aubrac, Lozere (13s, f/1.8, ISO4000)
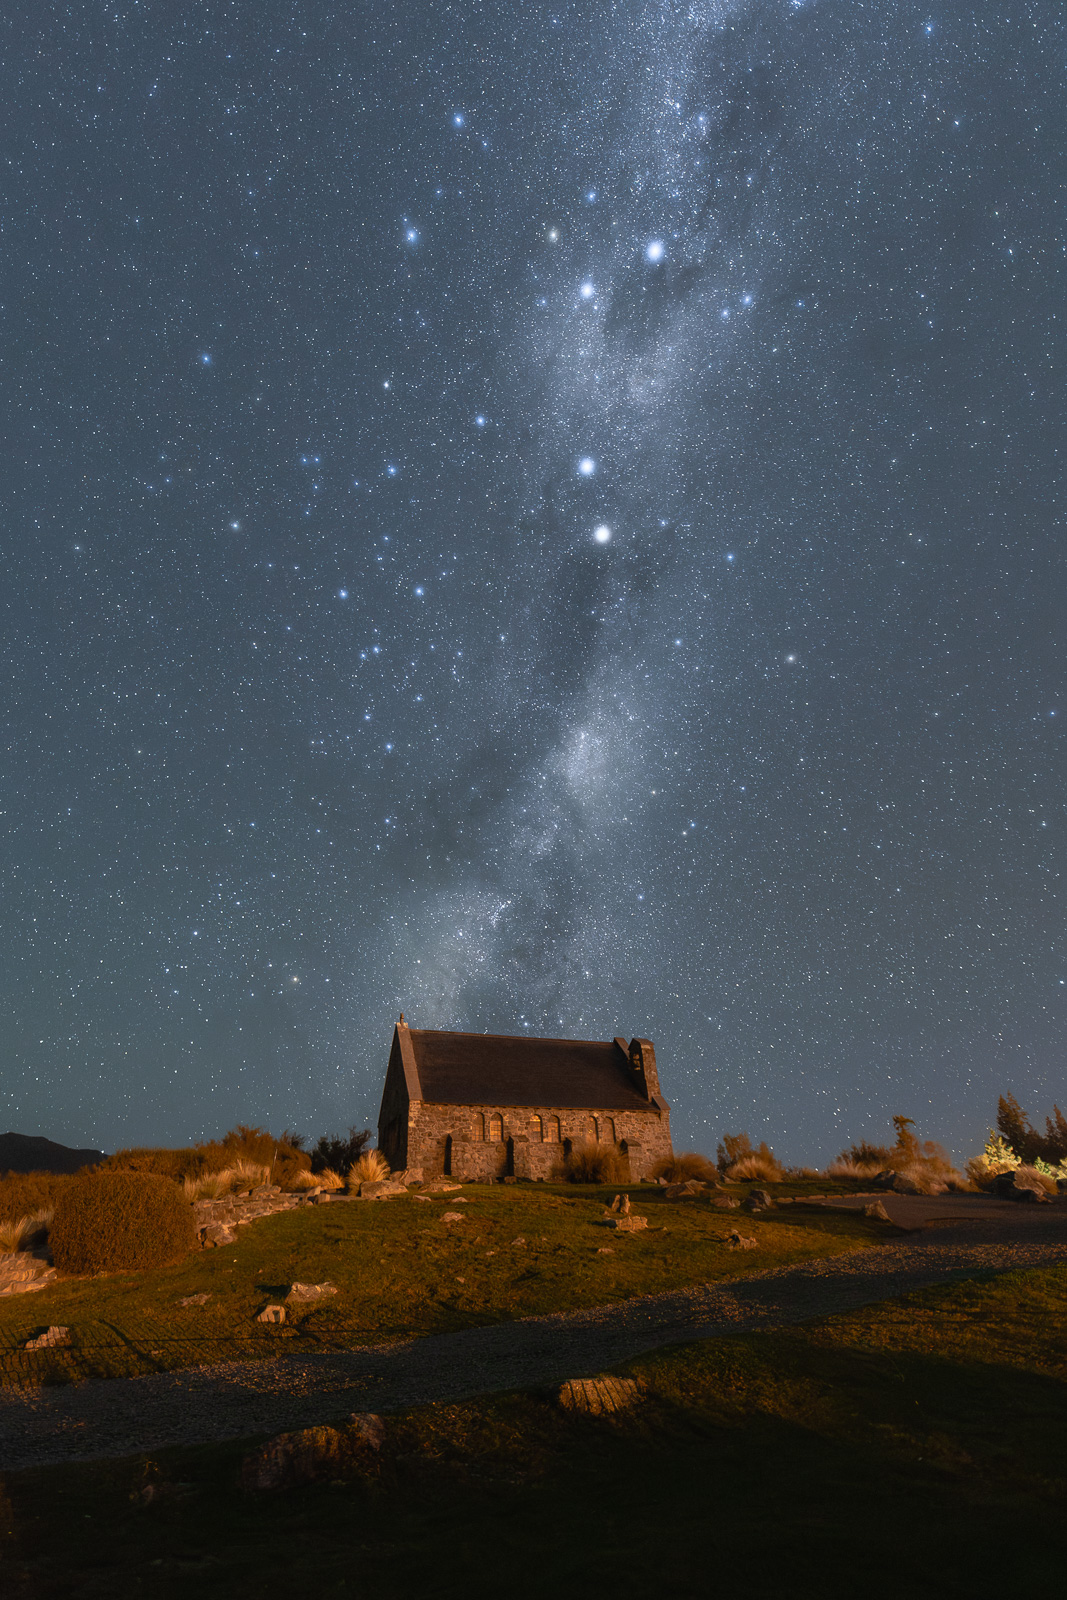
Photo 3 : Church of the Good Sheperd, New Zealand (10s à f/1.8, ISO 8000)
My beginner mistakes in astrophotography
I’m a little ashamed but I guess we all start somewhere, so ere are my mistakes from when I started out, maybe you can avoid making the same ones :
🏴 Don’t underexpose your shots. For a long time I had the habit of underexposing to protect the highlights during the day, so I thought it would be fine to do the same at night (at least not matter). In astrophotography, this is a mistake : pushing the exposure slider in post on an underexposed image amplifies digital noise far more than if you had exposed correctly in-camera. In short : an underexposed photo you “rescue” in Lightroom will always be noisier than a properly exposed one. Don’t be afraid to push ISO, your camera can handle it (yes it can!), and modern denoising tools are amazing.
📷 Only taking one shot per composition. As if I were shooting on film with a limited number of clicks 😂 Over time I learned to take a minimum of 13 photos for a single final image. Multiplying shots allows you to use a technique called “stacking”: by combining several images with dedicated software, you significantly reduce noise without losing detail. I’ll cover this technique in depth in a future article !
🎨 My photos came out orange. Two possible causes : a badly set white balance (see the settings section above), or way too much light pollution at the horizon on location. You can always desaturate the oranges slightly in post-processing, but nothing replaces a truly dark sky.
🌫️ Not using a lens heating band. I learned this one the hard way during a timelapse not so long ago, in April 2026 🥲 In humid conditions or at altitude, condensation gradually builds up on your lens, often without you noticing in the dark. The result : your first shots are sharp, then after an hour the sky starts looking soft, the stars develop a halo, and your entire timelapse is ruined. The solution came from Matthias : a heating band that wraps around the lens and is powered by a battery pack. It keeps the glass slightly above ambient temperature and prevents condensation from forming. It costs around 20€ and can save entire nights of work. I never go out without one now !
Les réserves de ciel étoilé en France : les meilleurs spots
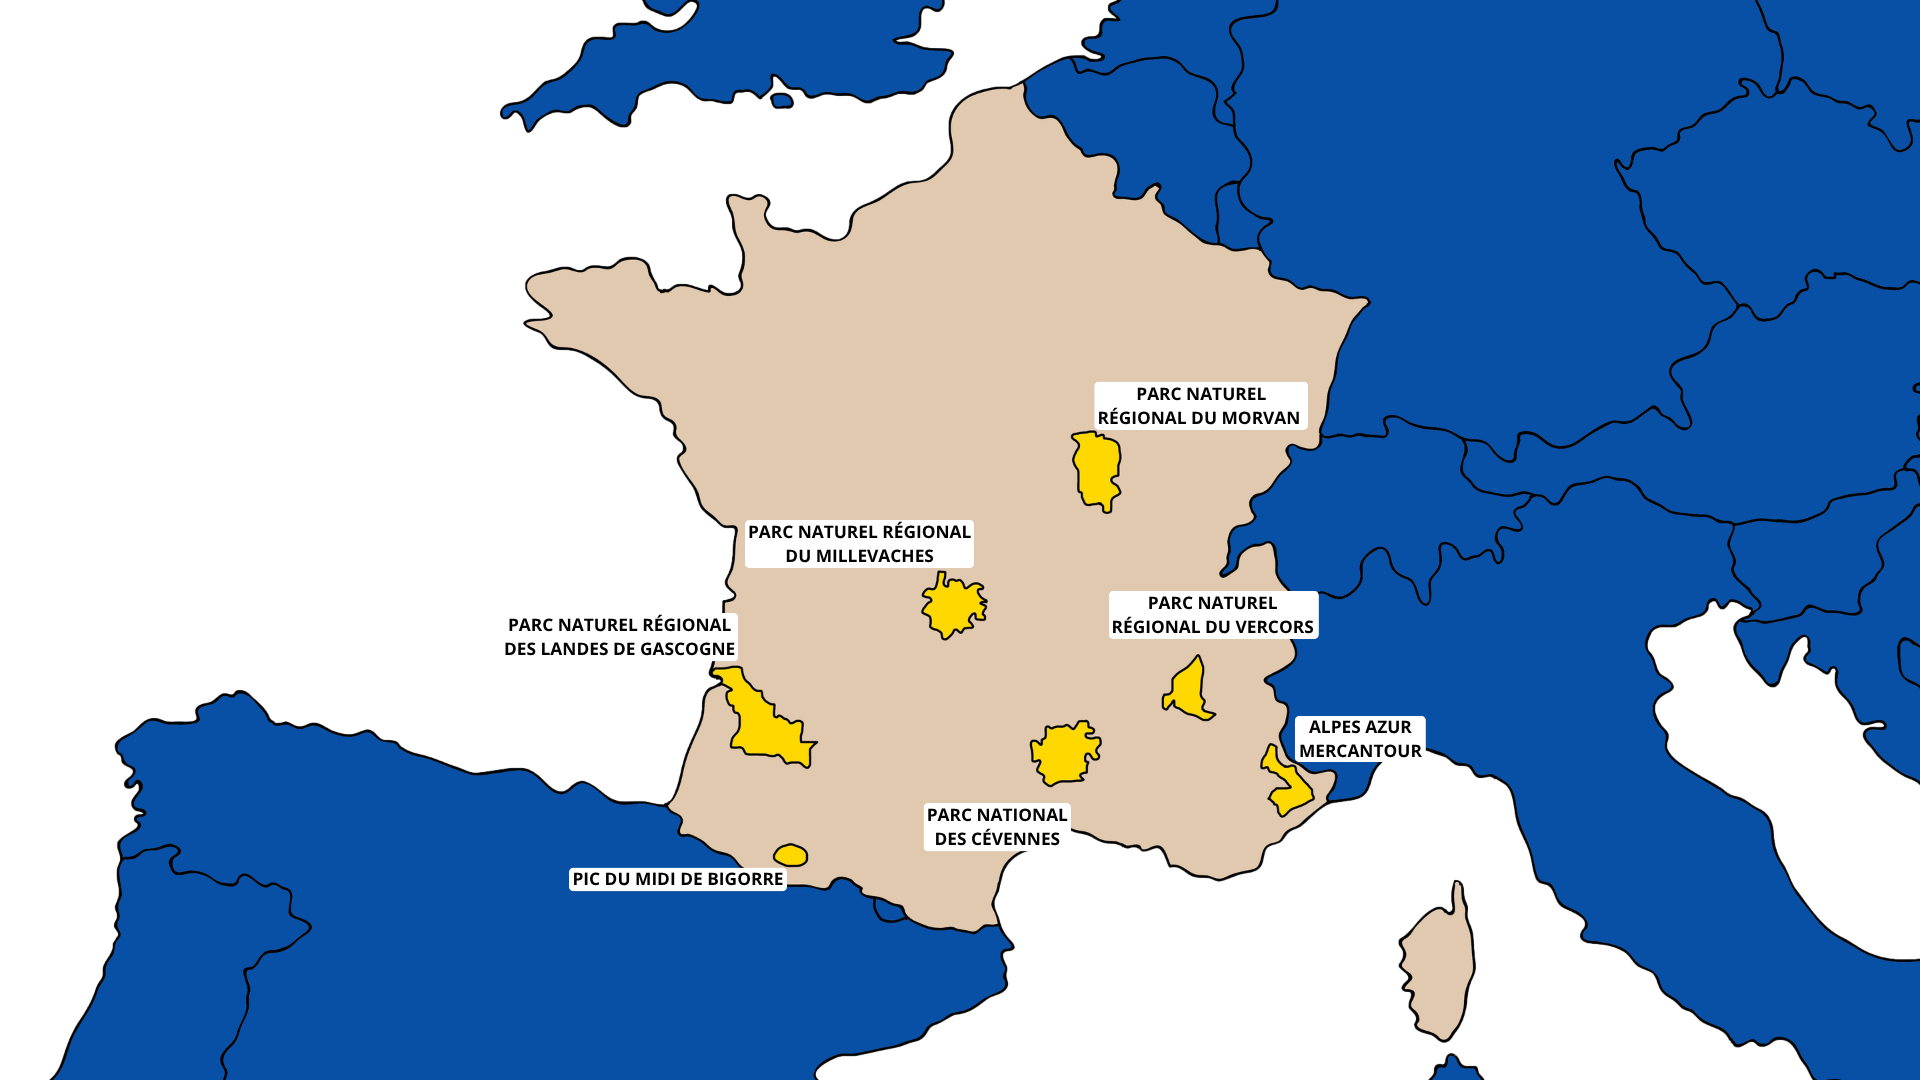
France is one of the best countries in Europe for preserved night skies and stargazing. It now has seven Réserves Internationales de Ciel Étoilé (called RICE, translated as International Dark Sky Reserves,IDSRs) certified by the international DarkSky organisation where concrete measures have been taken to reduce light pollution. If you go there, you’ll find minimal light pollution, perfect for sky photography :
1. Pic du Midi de Bigorre (Hautes-Pyrénées) : France’s very first IDSR, certified in 2013, and the first in Europe. It covers more than 3000km² in the Hautes-Pyrénées in the south of France. The Pic du Midi observatory even offers “magic nights” for sleeping under the stars with an observation programme, an experience I hope to be able to do one day.
2. Parc National des Cévennes : certified in 2018, this is the largest dark sky reserve in Europe with 3560km² of preserved skies. I’m lucky enough to live here, and the composition possibilities are endless : windmills, huge plateaux, rocks, villages, centuries-old trees, and even cows (yes, really !), anything can become a foreground under the stars. To give you an idea, the sky is so dark that I can see the Milky Way from the city-center of my town in midsummer.
3. Alpes Azur Mercantour : certified in December 2019, this reserve covers part of the Parc National du Mercantour, the Parc Naturel Régional des Préalpes d’Azur, and the Alpes d’Azur community. Six astronomy hotspots are listed across the territory.
4. Parc Naturel Régional de Millevaches en Limousin : certified in 2021, it’s one of the purest zones in France for night sky observation, with light pollution significantly decreasing in recent years.
5. Vercors : certified in September 2023, spanning the Drôme and Isère departments, the core zone covers 1600km².
6. Landes de Gascogne : certified in February 2025, this reserve covers more than 945km² in the heart of the Landes forests.
7. Morvan (Burgundy) : the seventh and most recent IDSR, certified in May 2025. With a population density of just 21 inhabitants/km² and a long tradition of switching off public lighting at night, the Morvan is among the darkest areas in central France.
Q&A : photographing the Milky Way
What camera do I need to photograph the Milky Way ?
A DSLR or mirrorless camera capable of handling high ISO is ideal. No need to invest in the most expensive body, a recent entry-level APS-C camera is more than enough to start. The lens is often more important than the body : go for a wide-angle focal length (14–24mm) with an aperture of f/2.8 or wider (f/1.8, f/1.4). Some recent smartphones can also capture the stars, but the results look very different from a proper camera.
What is the best time of year to photograph the Milky Way?
In the northern hemisphere, the Milky Way is visible from April to September, with peak galactic centre visibility in June and July. The most favorable nights are those near the new moon, when the sky is darkest. The window of true darkness can be short in summer (sometimes only from 11pm to 3am), so plan carefully with apps like Star Walk or PhotoPills.
What camera settings should I use to photograph the Milky Way ?
Basic astrophotography settings are : ISO between 1600 and 3200 (increase as needed), aperture between f/1.4 and f/2.8, shutter speed between 10 and 25 seconds depending on your focal length (use the 500 rule as a starting point and adjust), manual focus to infinity (check sharpness), RAW format. These are starting points, every camera, lens, and environment requires adjustments, so experiment in the field ☺️
Where can I photograph the Milky Way ?
Look for rural areas far from cities, national parks, and nature reserves. In France, there are seven International Dark Sky Reserves : Pic du Midi de Bigorre, Parc National des Cévennes (the largest IDSR in Europe), Alpes Azur Mercantour, Millevaches en Limousin, Vercors, Landes de Gascogne, and Morvan. You can also use lightpollutionmap.info to find dark zones near you.
Can I photograph the Milky Way without professional gear ?
Yes !! An entry-level or mid-range camera with a wide-angle lens at f/2.8 is enough to get beautiful Milky Way photos. What matters most is the location (very dark sky), planning (new moon, right season), and composition (an interesting foreground). Technique comes quickly with practice, and editing software like Lightroom can help you a lot to play around with post-processing.
To conclude before you go out to shoot the stars
Photographing the Milky Way means venturing out into the darkness of the night, often alone, armed with technique and wonder. This guide gives you all the foundations to get started, but nothing replaces your own nights of trial and error, tweaking, failing, and trying again (practice is everything !). I like to say that by doing it yourself you’ll usually answer your own questions as we all have a different gear. I’m still regularly learning things in the field too ! Happy hunting for beautiful compositions this summer 🌌📸
Marie